New player guide
Before creating a character
Bookmark the page
This seems like a no-brainer, but for the first two weeks I played I spelled Nodiatis "Nodeatus" and had to search through my history because I couldn't find it on Google.
Character Creation
Choosing a class
Class is actually relatively unimportant in Nodiatis; the bonuses are small, the class ability is often useless, and players can reroll to a new class at any time. However, you should choose a class that reflects the play style you want. Choose a caster class like Wizard or Druid if you want to focus on using gems, and a ranged class like Archer or Ranger if you want to focus on archery, etc.
Nodiatis does not restrict anything by class; any class can be any build. The sole reason to choose a specific class is for certain bonuses; for example, any caster class uses only one gate potion to return to town (other classes use up to 10 depending on level).
Creating a new Character
To create a new character, load Nodiatis and click "New Character." Select a face and background, then select a class from the class selection screen. Enter your username and password, then select "Existing Character" to log in with your new account.
First Steps After Logging In
Complete the Tutorial
You must complete the tutorial before you can chat or leave the first town. The princess will speak to you, so make sure to have your sound on if you want to hear her words of wisdom, as well as her plea for help.
The tutorial will force you to select a weapon, a weak crusher or a weak piercer; choose one and equip it as required.
Follow the instructions in the tutorial and you will do fine. After you complete the tutorial, you will be able to chat, and that is very likely the first time you will ever hear of this page!
Choose your weapon type and play style
There are four basic play styles in Nodiatis: Melee, Archer, Beastmaster, and Caster. Melee and archer are both good starter builds, whereas casting is recommended only for people who have learned the basics of the game already. Beastmaster is an easy and versatile build, but not until higher levels.
Melee types:
- Slash--Decent min and max damage
- Crush--Low min, high max damage
- Pierce--High min, low max damage
- Whip--Same as slash, but provides bonuses to pets
- Staff--Crushing damage, provides massive casting bonuses
Casting types:
- Damage over Time--Slower to kill, very efficient
- Direct Damage--Fast kills, inefficient
- Heals/restores--Extremely useful as supplements
Archery types are more complex; all archers use a bow, quiver, and arrow. The difference between builds is generally gem use.
Select your active/passive skills
Skill training in Nodiatis is split up into two categories: active and passive.
Active skills are trained by doing things; for example, stat skills are trained by killing creatures.
Passive skills gain experience over time automatically, based on your Passive Advancement skill level (Passive Advancement is a learning skill, and can only be trained passively). Before you can use passive training, you must gain at least one skill level in Passive Advancement, so this is recommended as the very first step.
To train a skill, open the skills page (the checklist icon below your inventory), and click a skill, then select Active or Passive.
The first skill you train should ALWAYS be Passive Advancement to at least level 1, followed by whichever skill you need for your weapon e.g., Slashing.
Collecting and sacrificing trophies
Weaponry, Archery, Protection, Life/Psych/Death Magic, and Beast Mastery skills can only be trained by sacrificing trophies to the appropriate altars.
Collecting trophies is simple: kill monsters and loot their bodies. Quicker looting can be accomplished by clicking the "LOOT" heading to loot all.
There are two types of trophies: spirit and combat. Each can only be sacrificed to certain altars. Spirit trophies can be sacrificed to the altars inside the church, as well as the Altar of the Beast. Combat trophies can only be sacrificed to the altars outside the church.
Hover over the altars to see which altar increases which skills.
- Altar of Steel--Combat Trophies
- Altar of Archers--Combat Trophies
- Altar of the Shield--Combat Trophies
- Altar of the Beast--Combat and Spirit Trophies
- Altar of Dementia--Spirit Trophies
- Altar of Life--Spirit Trophies
- Altar of Torment--Spirit Trophies
Gems
Gem Overview
Gems are the means to casting spells in Nodiatis.
You must train Sorcery to place Life Magic (green and white) gems in your gem pouch, Diabolism to place Death Magic (red and black) gems in your gem pouch, and Mind Bending to place Psych Magic (blue and grey) gems in your gem pouch.
Once in your pouch, gems are randomly drawn and placed in your gem draw slot in battle. You can then drag these gems (or use hotkeys) into your gem bar for use.
Purchasing Gems
Gems are items, and must be purchased from a store.
Gem locations are based on color, and can be found in the following stores:
- Death and Psych Magic--Magic Shop
- Green Gems--The Inn
- White Gems and all Auras--The Pet Store
Gems are not consumed when used; a single purchase is sufficient to use forever. However, gems are extremely expensive when attempting to fill a pouch. As an example, 50 level 94 storebought gems cost approximately 2.5 million gold, where a level 94 weapon costs approximately 1/4 of that.
Equipping Gems
Before equipping a gem, you must have two skills leveled: the relevant pouch limit skill (Sorcery, Diabolism, or Mind Bending depending on color), and the actual gem color skill, e.g, white or red magic.
Once you have met these prerequisites, click the gem pouch icon next to the inventory icon, and drag your gems from the inventory to the gem pouch.
Important note: the first slot in the gem pouch is automatically drawn in battle if you are using a staff. The second, third, and fourth slots are aura slots; any gem can go in them, but auras have a chance of automatically being drawn if placed in those slots (chance based on Gem Handling skill).
Using Gems in Battle
As previously mentioned, gems automatically draw and appear in the bottom "draw slot" in battle.
Drag these gems from the draw slot to the hotbar (or use hotkeys, see Using Hotkeys section), then click them to cast. Gems will automatically cast when placed into an autocast slot (see Autocast).
Gems that are click-to-use will always use mana and/or energy. Certain gems, such as most auras, are cost-free to use.
Gem slots in battle are counted right to left, i.e., slot 1 is far right, and slot 6 is far left.
Note: Slot 6 and 5 are unavailable to free accounts, and slot 6 is unavailable to standard accounts. Premium accounts can access all slots (see account types under Paid Items and Upgrades section).
Combat
Preparing for Combat
Before entering combat, two things are recommended, but optional: consume a potion (Armor Class is best at low levels) and enable hotkeys (chat command /hotkeys or /h).
Also highly recommended is joining a "solo group," a group where the members fight on different squares. This takes advantage of the Group Acumen learning skill, increasing experience gained by up to 50%.
Rested time
Rested time is used in combat to grant 6x trophies, experience, and gold. If you run out of rested time, you will receive 1/6th the amount of everything.
By default, each player gets 1 hour of rested time per day, as well as a one-time 3 hour rested time bonus for adding an email address to the account. This amount can be increased with learning skills, and is different for paid accounts: 2 hours per day for standard accounts, 3 hours for premium accounts.
Unused rested time is rolled over into your rollover rested time, capacity of which is increased by learning skills. For this reason, some new players will stop playing for a few days in order to build up a large reserve of rested time.
Rested time can be added using time cards, at an amount of 6 hours (7 hours with the grinder upgrade).
Entering Combat
Entering combat is simple: simply click on your face to enter combat (or use the "Find Monster" hotkey, default [F])
If you enter combat on most squares, you will encounter a normal monster. If you enter combat on a boss location, you will encounter a boss if you have a quest for that boss, or you have not killed it (applies if anyone in your group meets these criteria).
Autoattack and Autoshoot
The first thing you should do upon entering combat is toggle autoattack or autoshoot, depending on your weapon. This should always be your first action.
Click the autoattack button or use default hotkey [A] to autoattack; click the autoshoot button or use default hotkey [S] to autoshoot.
All melee weapon users except staff wielders can also equip a bow, quiver, and arrow; due to extremely powerful opening bow damage, you may wish to toggle autoshoot upon entering combat, then toggle autoattack after the opening shot. This is a very common strategy for fast kills.
Gem Use In Combat
Gems will automagically be drawn into your draw slot. Drag them (or use hotkeys 1-6) to your cast slots, then click to use them. Right click (or use ctrl+1-6) to "destroy" the gems and remove them from the slots.
Gem slots can be set to autocast by shift+clicking the slot. This is an excellent strategy for a staff-wielding caster with a well-balanced pouch. By holding the button for the slot number (for example, 6) and setting that slot to autocast, you can essentially automate the task of casting.
Class Ability Use
Every class has a class ability for use in combat, ranging from damage to healing to status effects. Class abilities and Cleanse (see Cleanse section) share a cooldown unless you level Superior Cleansing.
The hotkeys for class abilities are [D] for primary class, and [F] for secondary class (available at level 40).
Looting
After killing the monster, loot your trophies and/or dropped items. You can do so by individually dragging stacks to your inventory, or by clicking the LOOT button above the loot section, which will perform a "loot all" action.
Make sure to wait several seconds for the gold chest to appear. It may appear over the Exit button, so be sure to click on the edge of it in that case.
Fighting Bosses
Bosses are much more difficult than normal monsters, do not drop trophies at all, and only drop items the first time you kill them. However, they offer greatly increased gold chests, so they are ideal for gold farming.
To attract a boss repeatedly, you must stand on the boss square while either in a solo group (see Preparing for Combat) with someone who has not killed it, or by toggling Bossbait Mode (chat command /bossbait or /bo).
Resourcing
Resourcing Overview
Resourcing can only be completed after fighting and defeating a monster, by selecting the resourcing icon if you have a resourcing tool in your inventory.
Resource types are gardening, foraging, hunting, trapping, woodcutting, and hunting.
Silks can also be collected, but are dropped at random by monsters, rather than a minigame like other resourcing types.
Epic tools can be purchased from high level towns, and provide a +1 bonus to resource tiers. The travel gear Compass of the Forlorn also provides a +1 bonus.
Foraging
Hunting
Mining
Woodcutting
Trapping
Fishing
Gardening
Advancement and Progression
Advancement Overview
Progression in Nodiatis can be slow, and requires a lot of grinding. That said, I've put together a number of tips that should help.
Use the information in the sections below to make your progression as easy as possible.
Leveling Up
Before leveling up, it's recommended that you disabled Auto Stat Skill Cycling by right clicking the screen, then clicking Account Options, then Disable Auto Stat Skill Cycling. Otherwise, your stat skills will increase evenly, removing your ability to customize your build. While this is good for new players, it will require a lot of work fixing your stats later.
To level up, you must gain 4 stat skills in any combination. For example, you can gain 3 points in Melee, 1 point in Defense, and 0 in Magic and Recovery. The combination doesn't matter, but you can only have 140 in each skill (compared to a total of 340 stat skills possible at level 85).
Gain experience in stat skills by killing monsters, preferably at or above your level. Experience gained is much less when killing below your level. You should also avoid killing "black" monsters, which are 5 levels above your player level. Black monsters have extra damage mitigation, so the kills are slow and ruin your xp-per-hour ratio.
Remember your learning skills! By themselves, they don't give any active bonuses, but they improve your ability to gain experience in numerous ways.
Kill speed is the golden rule of Nodiatis. Everything in PVE (Player Vs. Environment) revolves around getting faster kills for faster experience, gold, and gear, so remember the golden rule: DPS is the first priority.
Powerleveling is a method of leveling faster, by having another player kill higher level monsters for you. Most players require a fairly large fee to do so, so you are unlikely to use this method until a higher level.
Finally: paid upgrades make leveling MUCH faster. Acceleration and Double Acceleration help you burn rested time faster, whereas paid account time increases your rested time per day, and virtues increase your experience by up to 100%. Upgrades are covered in another section.
Your First Pet
One of the first questions any new player asks is "How do I get a pet?" The answer is laid out here.
Your first step is to get level 10 Petmanship. Remember, you can sacrifice both combat and spirit trophies to the Beast altar.
The first pet is a Sewer Rat, level 10. You can purchase it from the Pet Store in the third town, Fenelia, or you might get it as a drop before then from either the Drunken Fisherman in the Abandoned Docks, or the Ogre Outcast in the Traveler's Way.
Equip it by dragging it to the first pet slot in your inventory. The second slot is for your second pet, and cannot be unlocked until level 30 petmanship.
Travel Gear
Travel Gear is required to travel to certain places. Most travel gear is dropped by bosses, while some is purchased in stores.
The most important thing to remember about travel gear is some can be skipped. For example, you can skip purchasing the raft by having a higher level player take you to Moss Dungeon Level 4 to get the Ocean Waders.
More travel gear information can be found Here.
Chat
Chat Overview
Chat is absolutely essential to Nodiatis. Civil is the normal channel, used to finding groups, selling/buying items, asking for and giving advice, and much more.
Chats have various rules, but there are two pieces of etiquette you should remember to be successful: do not beg, and do not spam. Either is likely to get you ignored by high level players who are normally very helpful.
Channels and Rules
Civil is the typical channel, accessed by typing /c or /s, or by your default option (selected by right clicking and selecting Default Chat Options). Civil does not allow swearing, or discussion of politics, sex, or religion.
Uncivil is for discussion of everything banned in Civil. This is where you can swear, talk about sex, religion, politics, etc., or just act like an idiot if you feel like it. There are only two things banned in /u: Mod Bashing, and spamming.
Group chat is between you and your group. It is not moderated, except in cases of your group member reporting you for bannable activity (like botting), and you can say whatever you please. It is accessed by typing /g or using your default chat option.
Primary and Secondary Clan chats are for speaking with your clan(s). This is where you'll socialize, make plans, and do everything else clans must do without speaking in public. Access them by typing /1 or /2.
Private Messaging is for speaking with individuals privately. This can be accomplished by clicking the player's face, or by typing /t playername.
Common Terms and Acronyms
LFSG: Looking For Solo Group (a group where players fight on different squares, and take advantage of the Group Acumen skill).
TC: Timecard, the premium currency of Nodiatis.
LFBG: Looking For Beast Group (a group to fight the randomly spawned Epic or Legendary beasts).
Bliss: gold received by all players when a player makes a purchase with real money.
Looking for Temp: Looking for a temporary arena team, for purposes of arena bonus and tokens.
Trading
Trading Overview
Trading is one means of transferring items in Nodiatis, the other being the Auction House (discussed in the Auction House section).
How to Trade
Trade with a player by right clicking on his/her face and selecting "Offer Trade." Never do so unless they expect it. Trading immediately pulls up a fullscreen trading window, which interrupts whatever the player is doing, and is considered extremely rude if unexpected.
You can trade up to 20 stacks of items at a time, along with gold
Who Can Trade
Anyone can offer trade or receive an offer, but free accounts cannot place items into a trade window. The exception to this rule is when a paid player places a Time Card into the window; in this case, and this case only, the free player can trade gold/items to the player offering the time card.
What Can Be Traded
Only unsoulbound items can be traded or bought/sold on the Auction House. Most items become soulbound upon equipping them, and they can be unsoulbound by selling to a store and buying back. Certain items, like travel gear, are soulbound on receipt and can never be traded or sold.
Auction House
Auction House Overview
The Auction House is the primary way to buy and sell goods in Nodiatis. All unsoulbound items can be sold and bought on the AH, including Time Cards, a paid item that grants account time or rested time.
Accessing the Auction House
To access the Auction House, click on the second icon from the left at the bottom of the screen, labelled AUC.
Click on a category to browse items. Right clicking on the Resources category will bring up ALL resources, rather than showing resource subcategories.
Selling on the Auction House
To sell an item on the auction house, place it in your storage, then right click it and select "Auction Stack to Players." Enter the amount you are selling it for, and press enter.
When the item sells, you will receive the gold (minus goblin tax) automatically, and the buyer will receive your item.
You can cancel an auction at any time with no penalty by right clicking the item and selecting "Cancel Auction."
Buying From the Auction House
TO purchase from the auction house, open the auction house, and browse to the category you want. Click the item you wish to purchase, and select "Purchase Item."
You can also message the seller to negotiate a lower price.
Paid Upgrades
Time Cards
Time cards are the lifeblood of Nodiatis. They can be bought and sold ingame, and used for any upgrade, thus making it possible to have all paid upgrades without paying a dime of real money.
Time cards are sold in bundles, the lowest cost bundle is $24.95 for 5 time cards. The only way to obtain individual time cards is to purchase them from other players for game gold.
Standard Account
Standard accounts grant an extra hour of rested time per day, double learning and passive advancement experience, the ability to trade, and myriad other benefits.
1 time card can be used for 4 weeks of standard account time.
Premium Account
Premium account, like standard account, enables trading between players. It also grants 2 extra hours of rested time per day, triples learning and passive speed, and enables use of the Grinder upgrade if purchased.
1 time card can be used for 10 days of premium account time.
Acceleration Upgrade
Acceleration doubles the speed at which your rested time burns, and triples the rate at which rollover rested time burns. This results in 2x or 3x experience, gold, trophies, and gear per real hour. It also reduces the rate at which you encounter creatures while traveling.
Acceleration costs 11 time cards.
Double Acceleration Upgrade
Double Acceleration is an upgrade to Acceleration. It doubles the bonuses from the Acceleration Upgrade, and can only be purchased if you have already purchased Acceleration.
Double Acceleration costs 20 timecards.
Grinder Upgrade
Grinder is a rested time saver. It is only available if you have an active premium account. When active, it causes rested time to stop ticking down 1 minute after the end of combat, rather than when you are at full health/energy/mana. It also offers travel mode, which essentially turns off your rested time, at the expense of trophy and gold droprates and experience gains.
Grinder costs 11 timecards.
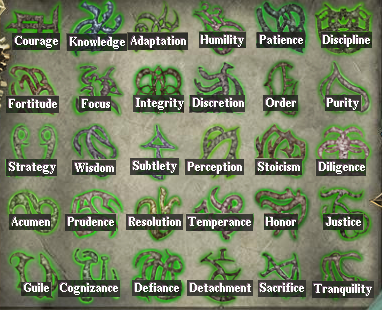
Virtues
Virtues are necessary to sell epic or legendary items to other players, and provide a 3.33% experience bonus for each you have, up to the total of 30. If you have all 30 virtues, you also gain double tokens in arena.
Virtues cost 1 time card each. To buy virtues, select "Purchase Virtues" from the menu which opens when right clicking on an epic or legendary item. The item must either be in your posession, or be shown to you in the trade window.